How to hang your bat house: A step-by-step guide!
February 17 2022 – Harrison Broadhurst
Have you decided to hang your bat house on a wall? Fantastic idea! Putting up a bat house is one of the best ways you can help save bats and also sustainably reduce pest insects from your yard. Additionally, walls are excellent locations for bat houses.
In this article, we will take you through a step-by-step guide on how to hang your new BatBnB on a wall, using the quick mounting system which comes included with your BatBnB.

If you haven’t decided on a spot for your bat house already, see our soon “Bat house placement guide” and our “choosing a location for your bat house” video (soon to be released!) which will help guide you through the process of identifying and selecting an ideal location for your BatBnB. If you have decided on a spot already, we recommend checking it out anyway in order to confirm that the location you’ve selected offers you the right features that bats will love. Choosing a good location is crucial for bat house success..
Now to the hanging guide: if you’re a visual learner (like myself) and you prefer to watch the installation step-by-step process rather than reading it, see our Hanging Guide Video here! (To be released on Friday 3/5/21)!
But for the readers, let’s dive in!
INCLUDED PARTS
With your BatBnB, you will receive:
1 MOUNTING CLEAT
These come pre-attached to the back of your BatBnB unit and function by gripping the mount piece.

1 MOUNT
Attach this piece to the surface you want to hang your BatBnB from. The side with the smaller surface area should connect with the hanging surface.

1 SAFETY BRACKET
Small metal bracket is attached on the lower back side of your BatBnB that will act as a safety mechanism against any lifting forces such as strong winds.

6 SCREWS
Screws that will attach the mount to your hanging surface.

TOOLS NEEDED
DRILL
Phillips-head bit or Phillips-head screwdriver

LADDER
Minimum 15 ft reach

LEVEL

SIMPLE 3-STEP PROCESS:
STEP 1: SECURE THE MOUNTING PIECE
Plan your approach: be sure that you have fasteners that will work with the material on which you are mounting your BatBnB. In this example, we are using masonry wall plugs for mounting on brick, but other masonry fastener systems will also work.
Take your ladder, mounting piece, level, screwdriver or drill, screws, and any other materials you may need for your situation outside.

Carefully position the ladder so that it is stable. Be sure to have a friend to help hold it steady. Please be sure to observe basic ladder safety and remember, it’s always cool to wear a helmet!
Place your mounting cleat on the wall. It should be at least 15 feet above the ground (or any protruding obstacle). When placing it, make sure the side of the mounting cleat with the smaller surface area is against the wall. The wide pre-drilled holes should be facing you.
Ensure that the mounting piece is level before securing the screws. (in some cases you may want to pre-drill the surface material).

If you are mounting your bat house on a brick or stone surface, you will need to follow these additional steps:
- Ensure the mounting cleat is level, and mark the position of the mounting piece’s holes using a pencil.
- Pre-drill the marked holes using a masonry drill bit. (You will need to use a drill for this step rather than a screwdriver). Ensure the holes are about 2-3 inches deep.
- Hammer in wall plugs using a rubber mallet or hammer. (This will allow the screws to have something secure to grip on to).


STEP 2: PLACE THE BATBNB

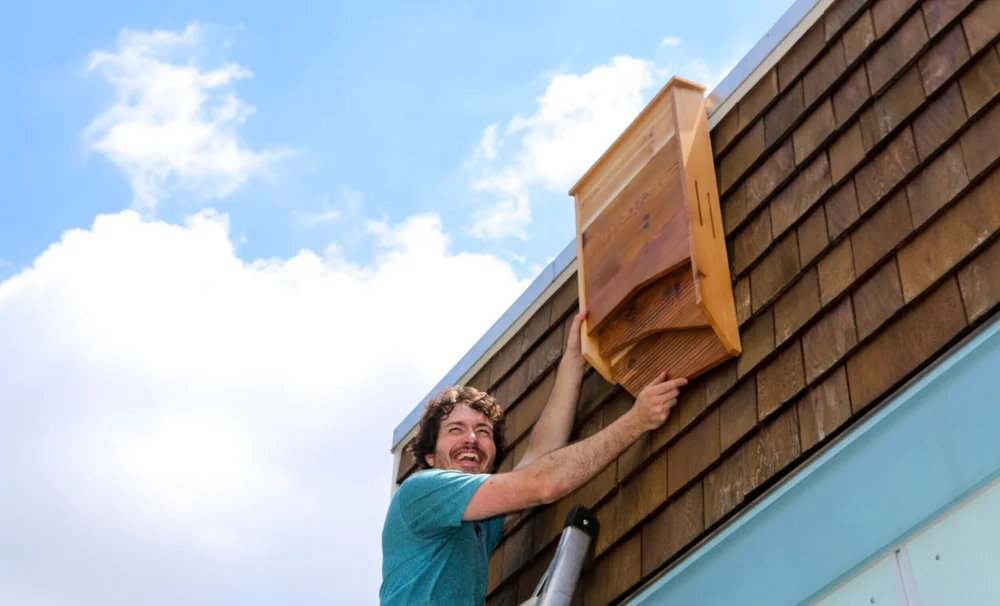
Carefully climb down the ladder to collect your BatBnB, and then carefully position the BatBnB under your arm as you climb back up the ladder. Keep in mind that BatBnBs are quite heavy and you should only perform this step if you feel confident carrying the BatBnB while staying balanced and safe on your ladder. If you feel uncomfortable, ask a friend to help you or hire a local contractor or handyman to assist.
Slide the cleats on the back of the unit onto the mounting cleat. It should fit snugly, if it does not, you may need to reposition the mounting cleat.

STEP 3: SECURE THE SAFETY BRACKET
Climb the ladder again with a screwdriver and one screw.

Adjust the bottom metal safety bracket so that it points straight down, and secure it with a screw.

That’s it! Your BatBnB is now fully functional. Thank you for providing these important mammals with a safe place to live.

If you would like to inspire others to help save the bats, feel free to share a photo of your newly installed bat house on social media using #BatBnB or send it to us in an email at support@batbnb.com. You can also leave BatBnB a review here.
We hope you found this guide helpful! Check out our other videos and articles for more bat house guides and FAQs.
Interested in getting a bat house? BatBnBs are excellent quality, expert-approved bat houses. Check them out here! Just look at what our clients are saying:
“I recently bought two bat boxes from BatBnB and love them! They are well-made and attractive and come with a book that has a lot of great information about bats and about the best place and way to hang the boxes. We put ours up at our house and within a week had one bat already living in it! We hope he invites all of his friends!”
— SHARON G. NC
SAFETY FIRST!
Hanging a BatBnB 15+ feet up can be scary! Seriously, we want you to be careful. If you’re not comfortable climbing a ladder while carrying the heavy BatBnB, find a friend to assist you or hire a local contractor to help. Take any additional cautionary steps to keep yourself safe, and always treat the animals with respect. When cleaning bat droppings (or any type of animal droppings) one should take precautions to avoid inhaling dust, or even better, avoid interacting with droppings entirely.
In no event shall Point Line Plane LLC be liable for any direct, indirect, punitive, incidental, special consequential damages, to property or life, whatsoever arising out of or connected with the use or misuse of Point Line Plane LLC products or from hanging, servicing, or altering Point Line Plane products.
Furthermore Point Line Plane LLC is not liable for any form of harm that may occur due to interactions with wildlife.
This product must be inspected for use to ensure it has not been damaged in shipment. If damaged in shipping, do not use and immediately contact support@batbnb.com to process a replacement.


0 comments